skip to main |
skip to sidebar

Klik op de bewerking voor ware grootte
Benodigdheden:
Tubes:
Eigen tube (ongeveer 343 x 276 pixels)
Watercolour Pearl tube
Watercolour flower tube
Maskers:
Watercolour mask
Insteekfilters:
Unlimited 2.0
Font:
Satisfaction
Materiaal
1. Open de tubes en masker in psp
2. Open een nieuwe afbeelding 600 x 600 transparant
3. Ga naar je materiaal palet en zet je voorgrondkleur op wit en je achtergrondkleur op zwart
4. Ga naar je Watercolour masker,
Bewerken – kopieren
5. Ga terug naar je afbeelding
Selecties – alles selecteren
6. Bewerken – plakken - plakken in selectie
7. Selecties – niets selecteren
8. Activeer je selectie tool - rechthoek, trek een rechthoek over het zwarte gedeelte
9. Lagen – nieuwe rasterlaag
10. Activeer je vulemmer en vul de selectie met voorgrondkleur
11. Selecties – niets selecteren
12. Effecten – textuureffecten – weefpatroon,

13. Ga naar je tube,
Bewerken – kopieren
14. Ga terug naar je afbeelding,
Bewerken – plakken – plakken als nieuw laag
15. Activeer verplaatsinstool en schuif de tube op de juiste plaats
16. Effecten – insteekfilters – Unlimited 2.0
Special effects 1 – watercolor – fade 160
17. Lagen – samenvoegen – zichtbare lagen samenvoegen
18. Activeer tekst tool, font: satisfaction – grootte 72 – maken als vector en anti alias aan gevinkt
19. Ga naar je materiaal palet en zet je voorgrondkleur op slot door op het rondje met diagonaal te klikken.
20. Type je tekst en plaats deze op de juiste plek
21. Afbeelding – randen toevoegen – 3 pixels zwart
Klik op de vraag op OK
22. Afbeelding – randen toevoegen – 35 pixels wit
23. Ga naar watercolour flower tube
Bewerken – kopieren
24. Ga terug naar je afbeelding
Bewerken – plakken – plakken als nieuwe laag
25. Activeer je verplaatsingstool en schuif de tube op de rechter hoek
(zie voorbeeld)
26. Lagen – dupliceren
27. Afbeelding – spiegelen
28. Lagen – dupliceren
29. Afbeelding – omdraaien
30. Lagen dupliceren
31. Afbeelding – spiegelen
32. Ga nu naar je watercolour pearl
Bewerken – kopieren
33. Ga terug naar je afbeelding
Bewerken – plakken – plakken als nieuwe laag
34. Activeer verplaatsingstool en schuif de pearl in het midden van de flower, rechts in de boven hoek
35. Lagen – dupliceren
36. Afbeelding – spiegelen
37. Lagen – dupliceren
38. Afbeelding – omdraaien
39. Lagen dupliceren
40. Afbeelding – spiegelen
41. Afbeelding – randen toevoegen – 3 pixels zwart
Klik op de vraag op OK
42. Afbeelding – randen toevoegen – 2 pixels wit
43. Afbeelding – randen toevoegen – 5 pixels zwart
44. Activeer gereedschap pen,


45. Ga naar materiaal palet en draai de kleur om, voorgrondkleur is zwart en achtergrondkleur wordt gesloten.
46. Trek een lijn op de bovenste rand tussen de flowers
(zie voorbeeld)
47. Lagen – omzetten in rasterlaag
48. Lagen – dupliceren
49. Afbeelding – omdraaien
50. Lagen – dupliceren
51. Afbeelding – vrij roteren – rechts 90
52. Activeer verplaatsingstool en schuif de lijn rechts tussen de flowers
53. Lagen - dupliceren
54. Afbeelding – spiegelen
55. Lagen – nieuwe rasterlaag, plaat hier je watermerk op
56. Lagen – samenvoegen – alle lagen samenvoegen
57. Afbeelding – formaat wijzigen – 600 pixels
Opslaan en klaar is Watercolour Tag
Wij zijn heel benieuwd naar jouw uitwerking van deze les.
Deze les mag niet zonder toestemming van EM Design
op een andere forum of website's geplaatst worden.
Deze les is gemaakt op 23 januari 2009
Een soort gelijke les berust louter op toevalligheden.

Onze 68e tube!
 Les die ik gebruikt heb is geschreven door Anneke van PSP4You
Download Hier
Please leave your comments.
Onze 95e!
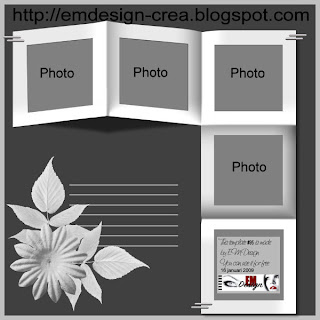
Download Hier
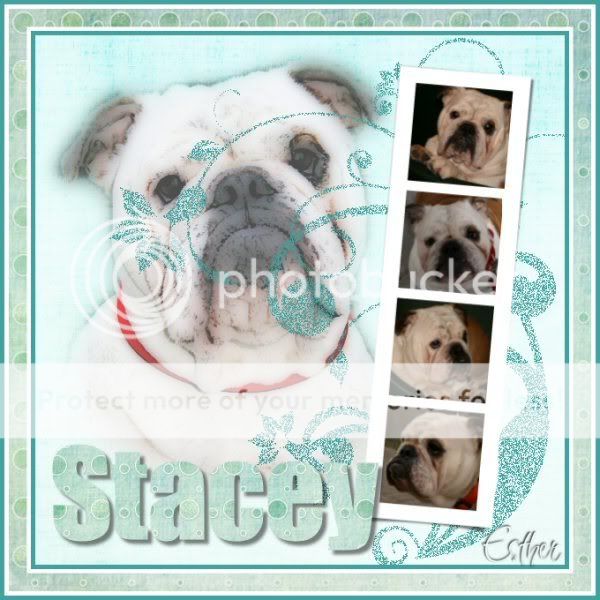
Another who fills this template, looks great, thank you!
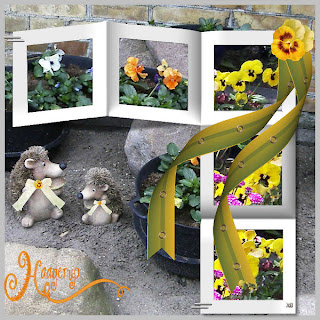
Made by Kirsten from Denmark
Please leave your comments.
Click on the image for truth size
Needed:
Tubes:
New York Sky line
New York vrijheidsbeeld
Letter N
Letter Y
Selection:
New York State of Mine
Brush:
hbg2003_lines2 001
hbg2003_lines 001
New York
Gif:
Fakkel EM Design
Pattern:
Zilver
Download material
1. Go to the materials palette and set foreground color on black and background color on zilver pattern, angle 359 - scale 120
2. Open a new image 600 X 400 pixels transparent
3. Activate flood fill tool and fill the image with foreground color
4. Layers - new raster layer
5. Selections - selections load/save - load selection from disk - New York State of Mine, mark source luminance and replace selection
6. Activate flood fill tool and fill the image with background pattern
7. Selection - select none
8. Image - mirror
9. Activate selection tool - Rectangle - mode: add - feahter 0 - mark anti alias
10. Pull now a rectangle on the side between the selection,
see example

11. Layers - new raster layer
12. Go to the New York Sky line tube
Edit - copy
13. Return to your image
Edit - paste - paste into selection
14. Selections - modify - select selections borders
Mark anti alias - insite - border width 1
15. Layers - new raster layer
16. Activate flood fill tool and fill the selection with background pattern
17. Selections - select none
18. Go to letter N tube,
Edit - copy
19. Return to your image
Edit - paste - paste as a new layer
20. Activate move tool, move the tube in the left above angle of the sky line
(see example)
21. Repeat point 18 till 20 and then with the character Y
22. Activate raster deform tool and turn the character Y, move the rings on each other
(see example)
23. Go to Vrijheidsbeeld (statue of liberty) tube
Edit - copy
24. Return to your image
Edit - paste - paste as a new layer
25. Activate move tool and the tube on the bottom of the selection edge.
(see example)
26. Layers - new raster layer
27. Activate paint brush - brush New York - size 310
28. click with the right mouse button (silver pattern) in your sky line.
(see example)
29. Layer - new raster layer
30. Activate paint brush - hbg2003-lines 001 - size 192,
click with the right mouse button in left above angle
(see example)
31. Layers - duplicate
32. Image - flip
33. Layer - new raster layer
34. Activate paint brush - hbg2003-lines2 001 - size 125
click with the right mouse button to the right
(see example)
35. Layers - duplicate
36. Image - flip
37. Layer - new raster layer, place on this your watermark
38. layers - merge - merge all flatten
39. Image - add borders - 5 pixels - White
Mark symmetric
40. Activate magic wand, tolerance and feather 0,
Select the border
41. Activate flood fill tool and fill the selection with background pattern
42. Effects - 3D effects - inner bevel

43. Selection - select none
44. Image - resize - 500 pixels width
45. Edit - copy
46. Open Animation Shop.
Edit - paste - as a new animation
47. Edit - paste - after current frame
total 7 times (you have now 8 frames)
48. Edit - select all
49. Open the fakkel EM Design.
50. Edit - select all
51. Towed the torch to the image of frame 1 to frame 1 on the torch of the Statue of Liberty
(see example)
Save and ready is New York State of Mine Animation
We are very curious to your development of this tutorial.
This lesson cannot without authorisation of EM design on another
forum or website' s be placed. This lesson has been made on
30 october 2006 A type equal lesson relies purely on contingency

Onze 63e tube!
Download Hier
Please leave your comments.
Onze 15e!
Download Hier
Please leave your comments.


 Groeten,
Esther en Martin
EM Design
Groeten,
Esther en Martin
EM Design


