skip to main |
skip to sidebar
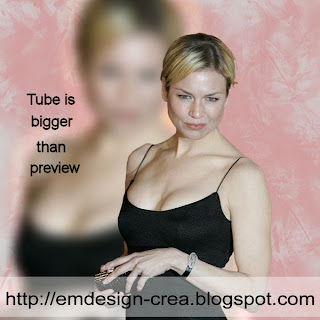
Click on the image for truth size.
Needed:
Tube max 400 hoog
Picture Frame:
Rand feest 03
Selections:
EM Design 4
EM Design 11
Animation:
Bubbels bruin
Download Materials
1. Open your tube (We start right with the tube)
2. Take two colors with you piped from your tubes, light foreground color and a dark backgound color.
3. Layers - new rasterlayer
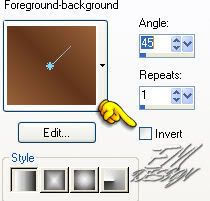
4. Go to the materials palette and set foreground color on gradient
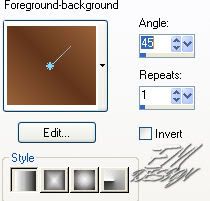
5. Activate flood fill tool and fill the layer with gradient
6. Adjust - add/remove noise - add noise

7. Layers - arrange - send to bottom
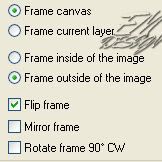
8. Image – picture frame – randfeest 03
9. Layers - merge - merge visible
10. Activate magic wand, tolerance 20,
Select the white part
11. Press now on delete on your keyboard
12. Selections - select none
13. Minimise this image
14. Open a new image 500 x 500 transparent
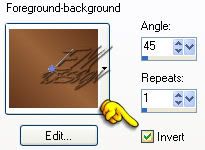
15. Activate flood fill tool, fill the image with gradient.
Mark now invert in gradient
16. Layers - new rasterlayer
17. Selections - selections load/save - load selection from disk - EM Design 11
18. Activate flood fill tool and fill the selection with gradient
Unmark invert in gradient
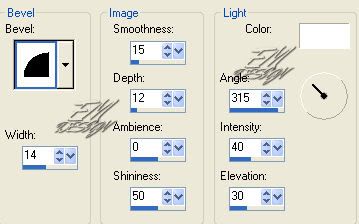
19. Effects - 3d effects - dropschadow
Vertical and horizontal 5, opacity 100, blus 35,00, color black
20. Adjust - add/remove noise - add noise
same setting
21. Selections - select none
22. Layers - duoplicate
23. Image - mirror
24. Image - flip
25. Go to your image with the tube
Edit - copy
26. Return to the new image
Edit - paste - paste as a new layer
27. Go to the layer palette and make raster 1 active
28. Effects - texture effects - blinds

29. Layers - merge - merge all flatten
30. Layers - promote background layer
31. Effects - plugins – unlimited 2,0 – edges square – square edge 16
standard settings
32. Layers - new rasterlayer
33. Activate flood fill tool and fill the layer with gradient
mark invert in gradient
34. Layers - arrange - send to bottom
35. Go to the layer palette and make raster 1 active.
36. Layers - new rasterlayer
37. Selections - selections load/save - load selection from disk - EM design 4
38. Activate flood fill tool and fill the slection with gradient
39. Selection - select none
40. Effects – 3d effects - dropshadow
same settings
41. Adjust - add/remove noise - add noise
same settings
42. Image - mirror
43. Layers - duplicate
44. Image - mirror
45. Image - flip
46. Layers - new rasterlayer, place on this your water mark
47. Layers - merge - merge all flatten
48. Image – add borders - 10 pixel different color
49. Activate magic wand and select the border
50. Activate flood fill tool and fill the border with background color
51. Effects - 3D effects - inner bevel
52. Selections - select none
53. Edit - copy
54. Open Animation Shop
Edit - paste - as new animation
55. 7 times Edit – paste - after current frame
(you have now 8 frames)
56. Open EM Design bubbles (take the color you want to use)
57. Edit - select all
58. Go to your new animation
Edit - select - all
59. Drag the animation from your first frame bubbles to your first frame of your new animation.
Drag the animation above the square right below
59. Return to the bubbles animation,
Edit - undo drag
60. Animation - flip
61. Drag the animation from your first frame bubbles to your first frame
of your new animation.
Drag it under the square on the top left-end corner
Save as Gif and ready is Bubbling Girl
We are very curious to your development of this tutorial.
This lesson cannot without authorisation of EM design on another
forum or website' s be placed. This lesson has been made on
25 october 2006 A type equal lesson relies purely on contingency
Onze 27e tube!

Download Hier
Please leave your comments.
Onze 26e tube!
Download Hier
Please leave your comments.

Click on the image for truth size.
Needed:
Photo (Max 600 pixels witdh)
Tubes:
Army Tag achtergrond
Army Tag alfabet A tot J
Army Tag alfabet K tot S
Army Tag alfabet T tot Z
Army Tag Bloempjes
Army Tag Nietje
Mask:
Army Tag Masker
Materiaal
1. Open the foto, tubes and mask in psp
2. Set the forefrond color on #6d9149 and background color on white #ffffff
3. Open a new image 600 x 500 transparent
4. Activate flood fill tool and fill the image with forefrond color
5. Layers - new rasterlayer
6. Fill this layer with backgroud color
7. Layers - new mask layer - from image - Army tag masker
Mark source luminance van bron and unmark invert mask data
8. Layers - merge - merge group
9. Activate selection tool – rectangle – mode replace - feather 0 –
mark anti alias
10. Draw a rectangle in the rectangle of the mask
11. Go to your photo,
Edit - copy
12. Return to your image,
Edit - paste - paste as a new layer
13. Activate move tool and move the photo such as your wants in the selection
14. Selections – invert
Press now on delete on your keyboard
15. Selections - select none
16. Go to the army tag alfabet,
17. Activate selection tool - rectangle
18. Select the first character of the name which you want to use.
19. Edit - copy
20. Return to your image,
Edit - paste - paste as a new layer
21. Activate move tool and move the character on the correct spot
22. Image - rotate - free rotate – left 3
23. Repeat points 16 till 22 for the rest of the characters. You put down character playfully.
Rotate the characters Right 5%, left 2%, right 7% and left 3%
24. Go to the nietjes tube (staple)
Edit - copy
25. Return to your image,
Edit - paste - paste as a new layer
26. Activate move tool, move the staple between the first 2 character, possibly moves the character on the correct distance.
(see example)
27. Layers - duplicate (staple layer)
28. Drawer the staple between the second and third character
29. Repeat point 27 and 28 so that each character has been linked by a staple
(see example)
30. Go to the layer palette, close de lower 3 layers (click on the eye)
the layers with the characters and staples remain open
31. Layers - merge - merge visible
32. Effects – 3d effects – dropshadow
Vertical and horizontal 2, opacity 50, blur 2, color black
33. Go to the layer palette and open de closed layers (by clicking on the eye)
34. Go to Army Tag bloempje (flower)
Edit - copy
35. Return to your image,
Edit - paste - paste as a new layer
36. Activate move tool and move the tube on the top left-end corner of your photo. (see example)
37. Layers - merge - merge all flatten
38. Image – add borders – 2 pixels forefrond color
39. Image – add borders – 25 pixels white
40. Activate magic wand, tolerance and feather 0
41. Select de white border
42. Go to Army Tag achtergrond
Edit - copy
43. Return to your image,
Edit - paste - paste into selection
44. Selections - select none
45. Image – add borders – 2 pixels forefrond color
46. Layers - new rasterlayer, place on this your water mark
47. Image - resize – 600 pixels witdh
save as JPG and ready is Army Tag
We are very curious to your development of this tutorial.
This lesson cannot without authorisation of EM design on another
forum or website' s be placed. This lesson has been made on
8 june 2008 A type equal lesson relies purely on contingency

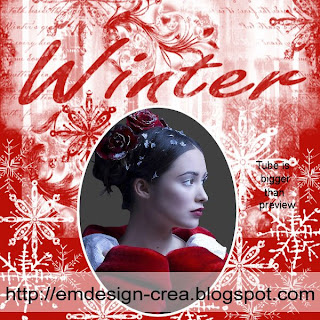
Click on the image for truth size.
Needed:
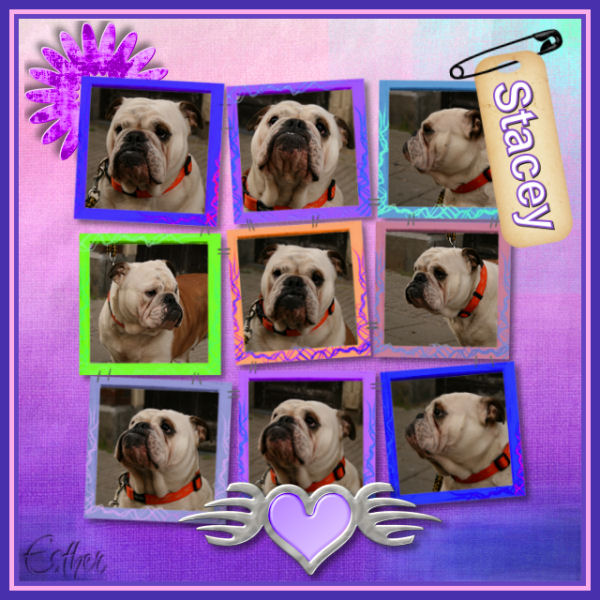
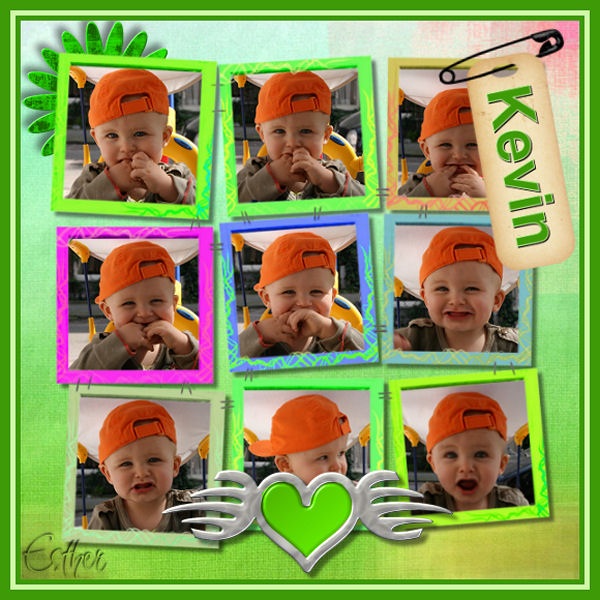
9 Photos
Tube’s:
Colorful tag bloem
Colorful tag achtergrond
Colorful tag frame
Colorful tag label
Colorful tag hart
Download material
1. Open the photos and material in psp ( choose from each tube the color which you want use)
2. Take two colors with you piped from one of your tubes, dark forefront color and a light backgound color.
3. Open a new image 600 x 600 pixels transparent
4. Go to the Colorful tag achtergrond
Edit - copy
5. Go to your new image,
Edit – paste – paste as a new layer
6. Go to the Colorful tag frame,
Edit - copy
7. Return to your image,
Edit – paste – paste as a new layer
8. Activate magic wand, mode: replace and tolerance and feather 0
9. Select the inside of the first frame
10. Selections - modify - expand – 4 pixels
11. Go to your first photo,
Edit - copy
12. Return to your image,
Edit – paste – paste as a new layer
13. Activate move tool and move the photo in the selection
14. Selections - invert
Press now on delete on your keyboard
15. Selections - select none
16. layers - arrange - move down
(if it is necessary, adjust-sharpness-sharpen)
17. Go to your layer palette, make upper layer (raster 2) active.
18. Repeat points 8 till 17 to place the remaining 8 photos
17. Go to your layer palette, make raster 3 active and close raster 2
(click on the eye for closing the layer)
18. Layers - merge - merge visible
19. Effects – 3d effects – dropshadow
horizontal and vertical 5, opacity 50, blur 5, color black
20. Image – resize – 90 precent
unmark resize all layer
21. Go to the layer palette and open raster 2
(click on the eye)
22. Go to the Colorful tag hart,
Edit - copy
23. Return to your image,
Edit – paste – paste as a new layer
24. Activate move tool and move your heart on the correct spot
(see example)
25. Effects – 3d effects – dropshadow
horizontal and vertical 5, opacity 50, blur 5, color black
26. Go to the Colorful tag bloem
Edit - copy
27. Return to your image,
Edit – paste – paste as a new layer
28. Activate move tool and move your Colorful tag bloem
on the correct spot (see example)
29. Effecten – 3d effecten – slagschaduw
horizontal and vertical -5, opacity 50, blur 10, color black
30. Layers - arrange - move down
31. Layers - arrange - move down
32. Go to your layer palette, make the upper layer (raster 3) active.
31. Go to the Colorful tag label
Edit - copy
32. Return to your image,
Edit – paste – paste as a new layer
33. Image - rotate - free rotate
left 10 precent
33. Activate move tool and move your label to on the top left-end corner
(see example)
34. Activate text tool, pick a nice font ( i got Arial)
35. Type your text and rotates the text till it beautiful in your label fit.
36. Layers - convert to rasterlayer
37. Effects – 3d effects – drop shadow
horizontal and vertical 1, opacity 100, blur 0, color black
38. Layers - merge - merge all flatten
38. Image – add borders – 5 pixels forefront color
39. Image – add borders – 5 pixels background color
40. Image – add borders – 10 pixels forefront color
41. Layers - new rasterlayer, place on this your water mark
42. Image - resize - 600 pixels
mark resize all layers
Save as .jpg and ready is Colorful Tag.
We are very curious to your development of this tutorial.
This lesson cannot without authorisation of EM design on another
forum or website' s be placed. This lesson has been made on
26 march 2008 A type equal lesson relies purely on contingency
Onze 86e!
Download Hier
Please leave your comments.

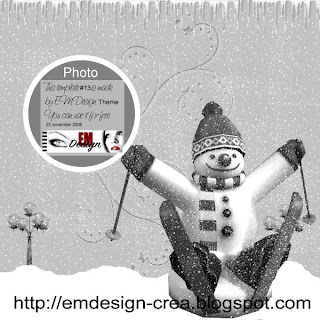
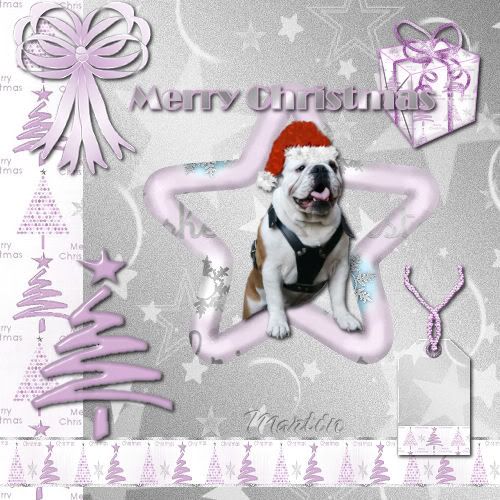
Click on the image for truth size
This is a easy Christmas tutorial.
Needed:
Christmas Time Frame
Christmas Time tekst
A beautiful tube (by me is that the dog),
Maximum 350 pixels width
Plugins:
VM Toolbox
VM Natural
Download material
1. Open the materials in psp
2. Open a new image, 484 X 349 pixels transparent.
3. Go to the materials palette and take with your pipette a beautiful Christmas color.
4. Activate flood fill tool and fill the image with your color
5. Go to your tube frame,
Edit - copy
6. Return to your image,
Edit – paste - paste as a new layer
7. Go to your tube (the dog)
Edit - copy
8. Return to your image,
Edit – paste - paste as a new layer
9. Layers - duplicate
10. Effects – plugins – VM Toolbox - Zoomblur-
Amount op 39- Adjust 60
11. Layers - arrange - move down
12. Activate move tool and move the orginele tube nicely down, exactly above the frame.
13. Effects - 3D effects - dropshadow,
Vertical and Horizontal 4, opacity 50, blur 5, color black
14. Repeat dropshadow but now vertical and horizontal -4
15. Go to your Christmas Time tejst (text)
Edit - copy
16. Return to your image,
Edit – paste - paste as a new layer
17. Activate move tool and move the text exactly above the tube
18. Layers - new rasterlayer, and place on this your water mark.
19. Go to the layer palette and close, rasterlayers 1 and 2 (click on the eye)
20. Layers - merge - merge visible
21. Layers - duplicate
22. Go to your layer palette and close the 2 merge layers and open
raster 1 and 2, make layer 2 active
23. Layers - merge - merge visible
24. Layers - Duplicate
25. Layers - arrange - move up
26. Activate Magic wand, tolerance 0 , feather 0 and anti alias markt.
27. Select the middle part of your background. (in the middle of part of your frame)
28. Effects – plugins - VM Natural- Sparkle,
chance only random seed on 130
29. Go to your layer palette and close this layer (Copy of Merged, click on the eye) and make merge layer (background layer) active
30. Effects – plugins - VM Natural- Sparkle,
chance only random seed on 140
31. Selections - select none
32. Go to your layer palette and open all close layers (
by clicking on the eye) and activate the upper layer (Merge layer)
33. Layers - merge - merge down
34. Return to your layer palette and make the upper copy of merged active
35. Layers - merge - merge down
36. File - save as - christmas time.PSP animation shop (*.psp)
37. Open Animatie Shop.
38. File - open - christmas time.psp
39. Edit - slect all
40. Animation - frame properties - display time 20
Save as gif and ready is Christmas Time animation
We are very curious to your development of this tutorial.
This lesson cannot without authorisation of EM design on another
forum or website' s be placed. This lesson has been made on
6 december 2006 A type equal lesson relies purely on contingency
Klik op de bewerking voor ware groote
Klik hier om deze les te maken

Klik op de bewerking voor ware groote
Dit is een makkelijk kerst animatielesje.
Benodigdheden:
Christmas Time Frame
Christmas Time tekst
Een mooie tube (bij mij is dat de hond),
Maximal 350 pixels breed
Insteekfilters:
VM Toolbox
VM Natural
Materiaal
1. Open de materiaal in psp
2. Open een nieuwe afbeelding, 484 X 349 pixels, transparant.
3. kies met je pipet een mooie kerstkleur.
4. Activeer je vulemmer, en vul je afbeelding met je gekozen kleur.
5. Open je tube frame,
Bewerken - kopieren.
6. Ga terug naar je nieuwe afbeelding.
Bewerken – plakken - plakken als nieuwe laag.
7. Ga nu naar je tube hond,
Bewerken - kopieren.
8. Ga terug naar je nieuwe afbeelding.
Bewerken – plakken - plakken als nieuwe laag.
9. Lagen - dupliceren.
10. Effecten – insteekfilters – VM Toolbox - Zoomblur-
Amount op 39- Adjust 60
11. Lagen – schikken - omlaag verplaatsen.
12. Activeer je verplaatsingstool, en schuif de orginele tube mooi naar beneden, net boven het frame.
13. Effecten - 3D effecten - slagschaduw
Verticaal en Horizontaal 4, dekking 50, onscherpte 5, kleur zwart.
14. Herhaal slagschaduw maar nu Verticaal en Horizontaal -4.
15. Ga naar je tube tekst Christmas Time
Bewerken - kopieren.
16. Ga terug naar je afbeelding
Bewerken – plakken - plakken als nieuwe laag.
17. Activeer je verplaatsingstool, en schuif de tekst net boven de tube.
18. Lagen - nieuwe rasterlaag, en plaats hierop je watermerk.
19. Zet nu je rasterlaag 1 en rasterlaag 2 op slot door op de oogjes te klikken in je lagen palet,
20. Lagen – samenvoegen – zichtbare lagen samenvoegen.
21. Lagen - Dupliceren
22. Zet nu de twee samengevoegde lagen op slot en open raster 1 en 2,
Maak raster 1 actief in je lagen palet
23. Lagen – samenvoegen – zichtbare lagen samenvoegen.
24. Lagen - Dupliceren
25. Lagen - schikken - omhoog verplaatsen
26. Activeer je toverstaf , modus toevoegen, RGB waarde, tolerantie op 0 , doezelen op 0, anti alias aangevinkt.
27. Selecteer het middelste gedeelte van je achtergrond. (midden gedeelte van je frame)
28. Effecten – insteekfilters - VM Natural- Sparkle,
zet random seed op 130. andere instellingen laten staan.
29. Zet je kopie van je achtergrond op slot door op het oogje te klikken in je lagen palet en maak de onderste laag actief.
30. Effecten – insteekfilters - VM Natural- Sparkle,
zet random seed op 140. andere instellingen laten staan.
31. Selecties - niets selecteren.
32. open alle lagen in je lagen palet door op het oogje te klikken en maak de bovenste samengevoegde laag actief
33. Lagen - samenvoegen - omlaag samenvoegen
34. Maak nu de bovenste kopie van samengevoegde laag actief in je lagen palet.
35. Lagen - samenvoegen - omlaag samenvoegen
36. Bestand - opslaan als - christmas time.PSP animation shop (*.psp)
37. Open nu je Animatie Shop.
38. Bestand - openen - christmas time.psp
39. Bewerken - alles selecteren.
40. Animatie - eigenschappen voor frame op 20 zetten.
Opslaan als gif en klaar is Christmas Time Animatie
Wij zijn heel benieuwd naar jouw uitwerking van deze les.
Deze les mag niet zonder toestemming van EM Design
op een andere forum of website's geplaatst worden.
Deze les is gemaakt op 6 december 2006
Een soort gelijke les berust louter op toevalligheden
Onze 25e tube!
Download Hier
Please leave your comments.
Onze 13e!
Download Hier
Please leave your comments.
Onze 24e tube!
Download Hier
Please leave your comments.
Onze 23e tube!
Download Hier
Please leave your comments.
Onze 22e tube!
Download Hier
Please leave your comments.

Click on the image for truth size.
Click here to make the tutorial
Click on the image for truth size.
Needed:
Xmas scrap tube's 1 till 10
1 beautiful Christmas tube Max. 225 width and/or 225 height
Download material
1. Open the tube's in psp
2. Open a new image, 500 X 500 pixels transparent.
3. Go to Xmas Scrap 1,
Edit - copy
4. Return to your image,
Edit - paste - paste as a new layer
5. Go to Xmas Scrap 2,
Edit - copy
6. Return to your image,
Edit - paste - paste as a new layer
7. Activate move tool and move the tube to the right (see example)
8. Go to Xmas Scrap 3 frame,
Edit - copy
09. Return to your image,
Edit - paste - paste as a new layer
10. Activate move tool and move the tube in the middle of your right side. (see example)
11. Go to your tube,
Edit - copy
12. Return to your image,
Edit - paste - paste as a new layer
13. Activate move tool and move the tube in your frame
Reduce if it is necessary (see example)
14. Effects - 3D effects - dropshadow
Vertical and Horizontal 2, Opacity 80, blur 5, color black
15. Go to Xmas Scrap 4 rand,
Edit - copy
16. Return to your image,
Edit - paste - paste as a new layer
17. Activate move tool and move the tube down
(see example)
18. Go to Xmas Scrap 5 strik,
Edit - copy
19. Return to your image,
Edit - paste - paste as a new layer
20. Activate move tool and move the tube on the top left-end corner on the separation line of the 2 backgrounds. (see example)
21. Effects - 3D effects - dropshadow
Vertical and Horizontal 2, Opacity 80, blur 5, color black
22. Go to Xmas Scrap 6 label,
Edit - copy
23. Return to your image,
Edit - paste - paste as a new layer
24. Activate move tool and move the tube to the right lower part.
(see example)
25. Effects - 3D effects - dropshadow
Vertical and Horizontal 2, Opacity 80, blur 5, color black
26. Go to Xmas Scrap 7 koord,
Edit - copy
27. Return to your image,
Edit - paste - paste as a new layer
28. Activate move tool and move this tube on the label Right below.
(see example)
29. Effects - 3D effects - dropshadow
Vertical and Horizontal 2, Opacity 80, blur 5, color black
30. Go to Xmas Scrap 8 boom,
Edit - copy
31. Return to your image,
Edit - paste - paste as a new layer
32. Activate move tool and move this tube to the left-hand side on the edge
(see example)
33. Effects - 3D effects - dropshadow
Vertical and Horizontal 2, Opacity 80, blur 5, color black
34. Go to Xmas Scrap 9 kado,
Edit - copy
35. Return to your image,
Edit - paste - paste as a new layer
36. Activate move tool and move this tube to the right upper part.
(see example)
37. Effects - 3D effects - dropshadow
Vertical and Horizontal 2, Opacity 80, blur 5, color black
38. Go to Xmas Scrap Merry Christmas,
Edit - copy
39. Return to your image,
Edit - paste - paste as a new layer
40. Activeer je verplaatsingstool and move this tube to the upper part exactly on the frame. (see example)
41. Effects - 3D effects - dropshadow
Vertical and Horizontal 2, Opacity 80, blur 5, color black
42. Layer - new rasterlayer and place on this your water mark.
43. Layers - merge - merge visible
save and ready is Xmas Scrap.
We are very curious to your development of this tutorial.
This lesson cannot without authorisation of EM design on another
forum or website' s be placed. This lesson has been made on
13 november 2006 A type equal lesson relies purely on contingency
Klik op de bewerking voor ware grootte.
Klik hier om de les te maken
Klik op de bewerking voor ware grootte.
Benodigdheden:
Xmas scrap 1 t/m 10
1 mooie kerst tube Max. 225 breed en/of 225 hoog
Goud patroon
Materiaal
1. Open je tube's in psp
2. Open een nieuwe afbeelding, 500 X 500 pixels transparant.
3. Ga naar Xmas Scrap 1,
Bewerken - kopieren.
4. Ga terug naar je afbeelding
Bewerken - plakken - plakken als nieuwe laag.
5. Ga naar Xmas Scrap 2,
Bewerken - kopieren.
6. Ga terug naar je afbeelding
Bewerken - plakken - plakken als nieuwe laag
7. Activeer je verplaatsingstool en schuif deze laag naar rechts, zorg dat er 1 kerstboompje nog te zien blijft van de eerste laag.
8. Ga naar Xmas Scrap 3 frame,
Bewerken - kopieren.
9. Ga terug naar je afbeelding
Bewerken - plakken - plakken als nieuwe laag.
10. Activeer je verplaatsingstool en schuif het in het midden van je rechter kant. (Zie voorbeeld)
11. Ga nu naar je tube of foto,
Bewerken - kopieren.
12. Ga terug naar je afbeelding
Bewerken - plakken - plakken als nieuwe laag
13. Activeer je verplaatsingstool en schuif het in je frame.
Eventueel de tube verkleinen. (Zie voorbeeld)
14. Effecten - 3D effecten - slagschaduw,
V en H 2, dekking 80, onscherpte 5, kleur zwart.
15. Ga naar Xmas Scrap 4 rand,
Bewerken - kopieren.
16. Ga terug naar je afbeelding
Bewerken - plakken - plakken als nieuwe laag
17. Activeer je verplaatsingstool en schuif deze rand naar beneden iets van de onderkant.
(Zie voorbeeld)
18. Ga naar Xmas Scrap 5 strik,
Bewerken - kopieren.
19. Ga terug naar je afbeelding
Bewerken - plakken - plakken als nieuwe laag
20. Activeer je verplaatsingstool en schuif de strik linksboven op de scheidingslijn van de 2 achtergronden. (Zie voorbeeld)
21. Effecten - 3D effecten - slagschaduw,
zelfde instellingen
22. Gan naar Xmas Scrap 6 label,
bewerken - kopieren.
23. Ga terug naar je afbeelding
Bewerken - plakken - plakken als nieuwe laag
24. Activeer je verplaatsingstool en schuif het label naar rechtsonder.
(Zie voorbeeld)
25. Effecten - 3D effecten - slagschaduw,
Zelfde instellingen
26. Ga naar Xmas Scrap 7 koord,
Bewerken - kopieren.
27. Ga terug naar je afbeelding
Bewerken - plakken - plakken als nieuwe laag
28. Activeer je verplaatsingstool en schuif dit koord op het label aan de rechteronderkant. (Zie voorbeeld)
29. Effecten - 3D effecten - slagschaduw,
Zelfde instellingen
30. Ga naar Xmas Scrap 8 boom,
Bewerken - kopieren.
31. Ga terug naar je afbeelding
Bewerken - plakken - plakken als nieuwe laag
32. Activeer je verplaatsingstool en schuif de boom naar de linkerkant op de rand. (Zie voorbeeld)
33. Effecten - 3D effecten - slagschaduw,
Zelfde instellingen
34. Ga naar Xmas Scrap 9 kado,
Bewerken - kopieren.
35. Ga terug naar je afbeelding
Bewerken - plakken - plakken als nieuwe laag
36. Activeer je verplaatsingstool en schuif het kado naar de rechterbovenkant. (Zie voorbeeld)
37. Effecten - 3D effecten - slagschaduw,
Zelfde instellingen
38. Ga naar Xmas Scrap Merry Christmas,
Bewerken - kopieren.
39. Ga terug naar je afbeelding
Bewerken - plakken - plakken als nieuwe laag
40. Activeer je verplaatsingstool en schuif de tekst naar de bovenkant, en plaats hem net op het frame. (Zie voorbeeld)
41. Effecten - 3D effecten - slagschaduw,
Zelfde instellingen
42. Lagen - nieuwe rasterlaag en plaats hierop je watermerk.
43. Alle lagen samenvoegen.
opslaan, en klaar is Xmas Scrap.
Wij zijn heel benieuwd naar jouw uitwerking van deze les.
Deze les mag niet zonder toestemming van EM Design
op een andere forum of website's geplaatst worden.
Deze les is gemaakt op 13 november 2006
Een soort gelijke les berust louter op toevalligheden


 Made by Kirsten from Denmark
 Groeten,
Esther en Martin
EM Design
Groeten,
Esther en Martin
EM Design