
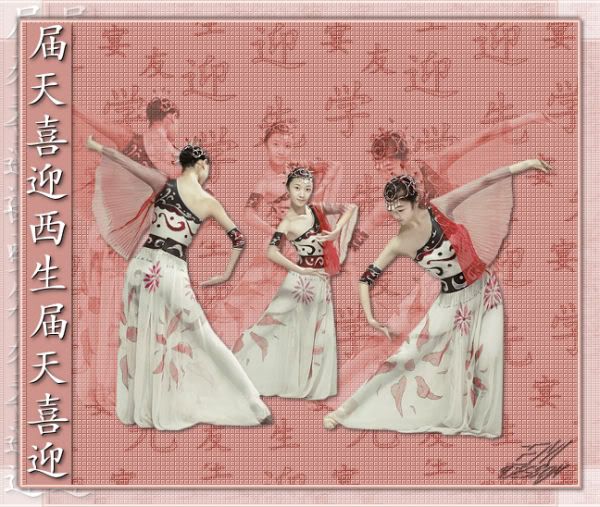
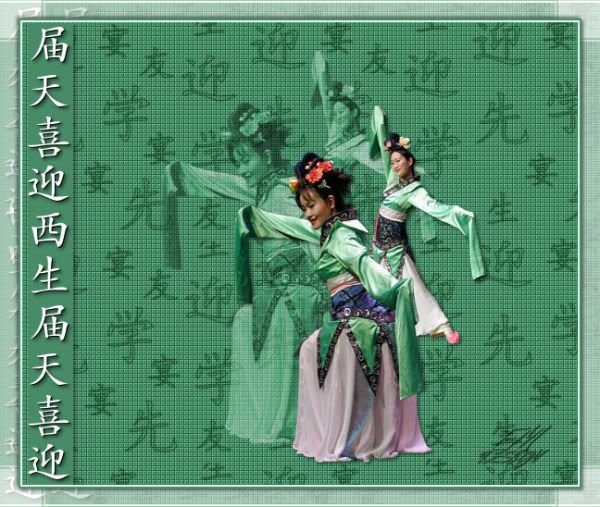
Click on the image for truth size.
Needed:
1 tube ( around 508 pixels width)
Tube chinese tekens Dan Chin
Pattern chinese tekens Dan Chin
Xero plugin
Toadies plugin
Materiaal
1. Open the tubes and pattern in Psp
2. Take two colors with you piped from your tube, light forefront color on a dark backgound color.
3. Open a new image 600 x 500 pixels tranparent
4. Activate the flood fill tool and fill the image with your background color
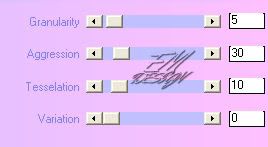
5. Effects – plugins – xero – fritillary
6. Effects - edge effects - enhance
7. Go to your tube
Edit – copy
8. Return to your image,
Edit – paste – paste as a new layer
9. Image – resize – 110 percent
resize all layers not active
10. Go to the layer palette and set opacity on 50 and blend mode on luminance
11. Edit – paste – paste as a new layer
12. Activate move tool and move the tube something down and something to Right
13. Effects – 3d effects - dropshadow
horizontal en vertical 2 – opacity 50 – blur 5 – color black
14. Go to your layer palette and activate Raster 1
15. Layers – new rasterlayer
16. Go to your material palette, change forefront color in pattern
Patroon chinese tekens Dan Chin, angle 359, scale 120
17. Activate flood fill tool and fill your image with your pattern
18. Go to your layer palette, set opacity on 50 and blend mode on overlay
19. Activate selection tool, rectangle - feather 0 and anti alias active
20. Go to your layer palette and activate Raster 3
21. Layers – new rasterlayer
22. Activate flood fill tool and fill the selection with your background color
23. Effects – 3d effects - dropshadow
horizontal en vertical 2 – opacity 50 – blur 5 – color black
24. Selections – select none
25. Go to your tube chinese tekens Dan Chin
Edit – copy
26. Return to your image,
Edit – paste – paste as a new layer
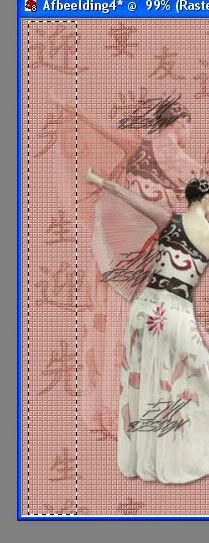
27. Activate move tool and move the tube to on the top left-end corner
(see example)
28. layers – duplicate
29. Activate move tool and move the copy under the original
(part of the tube is not visible)
30. Layers – merge - merge down
31. Effects – 3d effects - dropshadow
horizontal en vertical 2 – opacity 50 – blur 5 – color black
32. Layers – merge - merge all flatten
33. Image – add borders – 2 pixels – forefront color
34. Image – add borders – 2 pixels – background color
35. Image – add borders – 20 pixels – white
36. Activate magic wand. Tolerance and feather 0, select the white border
37. Effects – plugins – toadies – what are you? - overdose 20
38. Selections – select all
39. Selections – modify – contract – 20 pixels
40. Effects – 3d effects - dropshadow
horizontal en vertical 2 – opacity 50 – blur 5 – color black
41. Repeat dropshadow only now horizontal and vertical -2
42. Selections – select none
43. Layers – new rasterlayer, place here your water mark
44. Layers - merge - merge all flatten
45. Image – resize – 600 pixels width
Save and ready is Dan Chin
We are very curious to your development of this tutorial.
This lesson cannot without authorisation of EM design on another
forum or website' s be placed. This lesson has been made on
130 january 2007 A type equal lesson relies purely on contingency


Geen opmerkingen:
Een reactie posten