
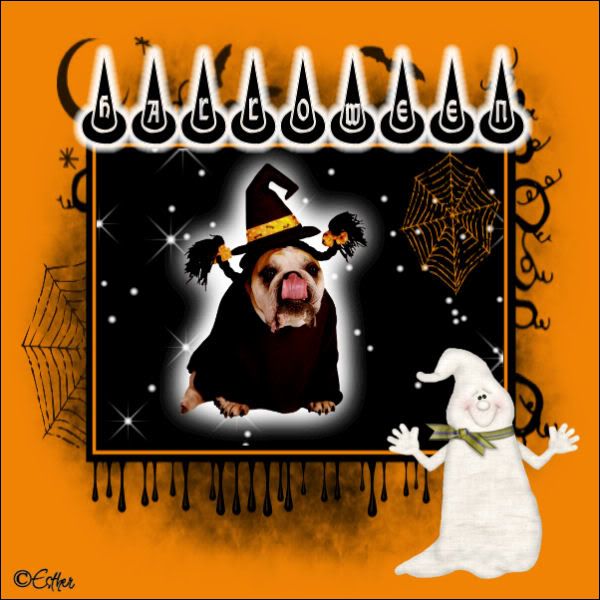
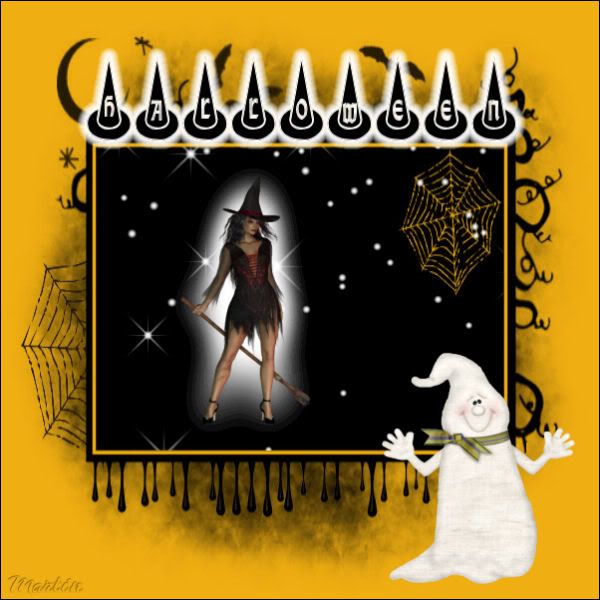
Click on the image for truth size.
Needed:
1 Halloween Ghost tube
1 Halloween tube (Bulldog in material)
1 Halloween masker
1 Halloween brush
101! Witches Hat font
Eye Candy 3.1 plugin
Download material
1. Open the tube’s and masker.
2. Open a new image 600 x 600 pixels transparent
3. Go to your materials palette, you put forefront color on black and your background color on orange.
4. Activate floot fill tool and fill the empty image with forefront color
5. Layers - new rasterlayer
6. Fill the layer with background color
7. Layers - new mask layer - from image – Halloween masker
Source luminance active
8. Layers - merge - merge group
9. Activate selection tool – rectangle
Make a rectangle over the black flat (including the spiderweb)
10. Go to the materials palette and chance the forefront color in white
11. Activate paint brush, search for Sterretjes les Halloween,
Stamp 1 time in the middle of your selection with your forefront color
12. Selections - select none
13. Go to your halloween tube (I have used the tube with bulldog)
Edit - copy
14. Return to your image,
edit - paste - paste as a new layer
15. Activate move tool, move your tube on the correct spot
(see example)
16. Selections - select all
17. Selections – float
18. Selections – defloat
19. Selections - modify - feather - 50 pixels
20. Layers - new rasterlayer
21. Activate floot fill tool and fill with your forefront color the selection until the tube has disappeared.
22. Selections - select none
23. Layers - arrange - move down
24. Go to your Halloween Ghost tube
Edit - copy
25. Return to your image,
edit - paste - paste as a new layer
26. Activate move tool, and move the tube right at the bottom of the angle.
27. Activate text tool, fotn 101! Witchhat, create as vector, size 48
28. Go to the materials palette and chance the backfront color in black
29. Make Raster 2 (upper layer) active in your layer palette
30. Type the text and appetite the text something larger and higher
31. Layers - convert to rasterlayer
32. Effects – plugin – Eye Candy 3.1 – Glow,
Width 10, Opacity 100, Opacity dropoff fat, color white
33. Activate move tool, and drawer the text in the middle
above the black flat. (see example)
32. Layers - new rasterlayer, place on this your water mark
33. Image - add borders – 1 pixel black.
34. Image - resize – 600 pixels
Save as jpg and Halloween tutorial is ready
We are very curious to your development of this tutorial.
This lesson cannot without authorisation of EM design on another
forum or website' s be placed. This lesson has been made on
4 october 2008 A type equal lesson relies purely on contingency


Geen opmerkingen:
Een reactie posten