
Click on the image for truth size.
Needed:
Photo (600 x 600 pixels)
Photo (200 x 200 pixels)
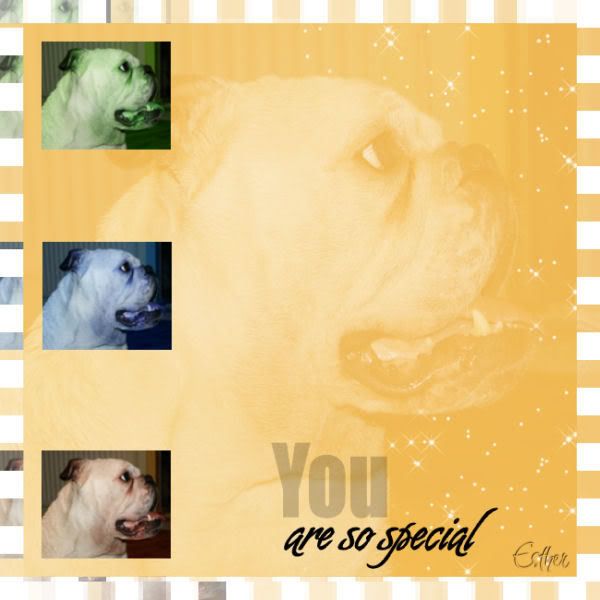
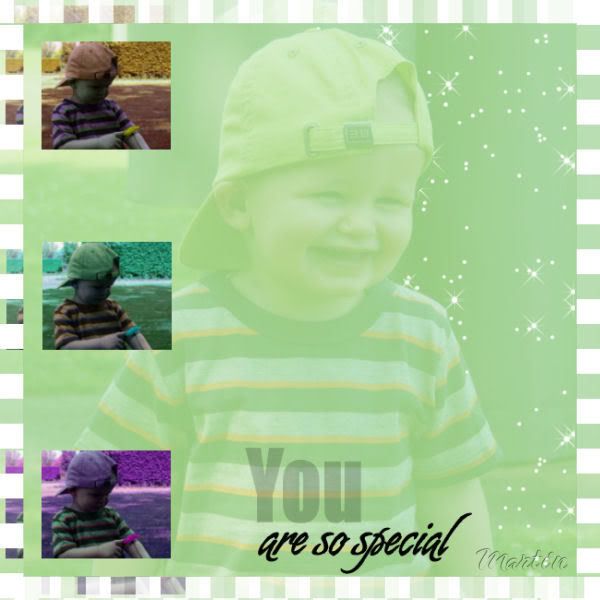
EM Design 3 blocks (600x600) selection
Word Art You are so special tube
Sterretjesbrush
Unlimited 2.0 plugin
DSB Flux plugin
Download material
1. Open your photo’s and tube in psp.
2. Open a new image 600 X 600 pixels transparent.
3. Take two colors, forefront colour on a light color to choice and backgroundcolor is white
4. Activate flood fill tool, fill the empty image with your forefront color.
5. Go to your photo of 600 x 600 pixels
Edit - copy
6. Go to your new image,
edit - paste - paste as a new layer
7. Go to your Layer palette, Opacity 60 and Blend mode on overlay
8. Layers - new rasterlayer
9. Selections - selections load/save - load selection from disk –
EM Design 3 blocks (600x600) (luminance from source, replace selection)
10. Activate flood fill tool and fill the selections with your backgroundcolor
11. Selections - select none
12. Activate Magic wand, tolerance and feather 0
Select the upper square
13. Go to your photo of 200 x 200 pixels
Edit - copy
14. Return to your new image
Edit - paste - paste as a new layer
15. Image - resize – 80 percent,
resize all layers - not active
16. Image - resize – 90 percent,
resize all layers - not active
17. Activate move tool , move the photo in the selection.
18. Effects - plug in – Unlimited 2.0 – color effects – swap red/green
19. Selections - invert,
Press now on delete on your keyboard
20. Selections - select none
21. Make raster 3 active in your Layer palette.
Activate Magic wand, tolerance and feather 0
Select the second square.
22. Edit - paste - paste as a new layer
23. Image - resize – 80 percent,
resize all layers - not active
24. Image - resize – 90 percent,
resize all layers - not active
25. Activate move tool , move the photo in the selection.
26. Effects - plug in – Unlimited 2.0 – color effects – swap red/blue
27. Selections - select invert,
Press now on delete on your keyboard
28. Selections - select none
29. Make raster 3 active in your Layer palette.
Activate Magic wand, tolerance and feather 0
Select the bottom square.
30. Edit - paste - paste as a new layer
31. Image - resize – 80 percent,
resize all layers - not active
32. Image - resize – 90 percent,
resize all layers - not active
33. Activate move tool , move the photo in the selection.
34. Effects - plug in – Unlimited 2.0 – color effects – swap green/blue
35. Selections - select invert,
Press now on delete on your keyboard
36. Selections - select none
37. Image - add borders – 25 pixels – white.
Click at the question on OK
38. Activate Magic wand, tolerance and feather 0,
Select the white border
39. Effects - plug in – DSB flux – linair transmission - vertical.
40. Effecten – insteekfilters – DSB flux – linair transmission - horizontal
41. Selections - select none
42. Layers - new rasterlayer
43. Activate paint brush, sterretjesbrush – size 300
Stamp 2x with your right mouse button (white) at the right-hand side within the big square.
44. Layers - duplicate,
Image - flip
45. Layers - merge - merge down.
46. Activate eraser tool, form - round, size - 100, hardnesses - 100.
Erase the sparklers which stand on your photo.
47. Go to your Word Art You are so special tube
Edit - copy
48. Return to your new image.
Edit - paste - paste as a new layer
49. Activate mover tool,
move the tube to the Right bottom in the middle
(see example)
50. Image - resize – 600 x 600 pixels
resize all layers, active
51. Layers - new rasterlayer, place here your watermark.
Store as jpg and You are so special tutorial is ready.
We are very curious to your development of this lesson.
This lesson cannot without authorisation of EM design on another
forum or website' s be placed. This lesson has been made on
20 augusts 2008 A type equal lesson relies purely on contingency


Geen opmerkingen:
Een reactie posten