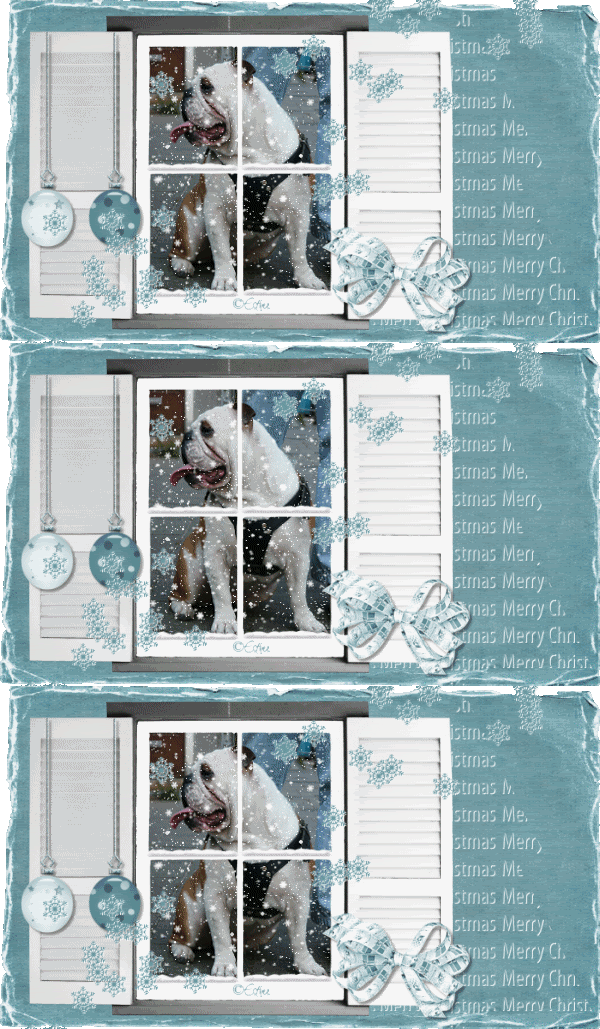
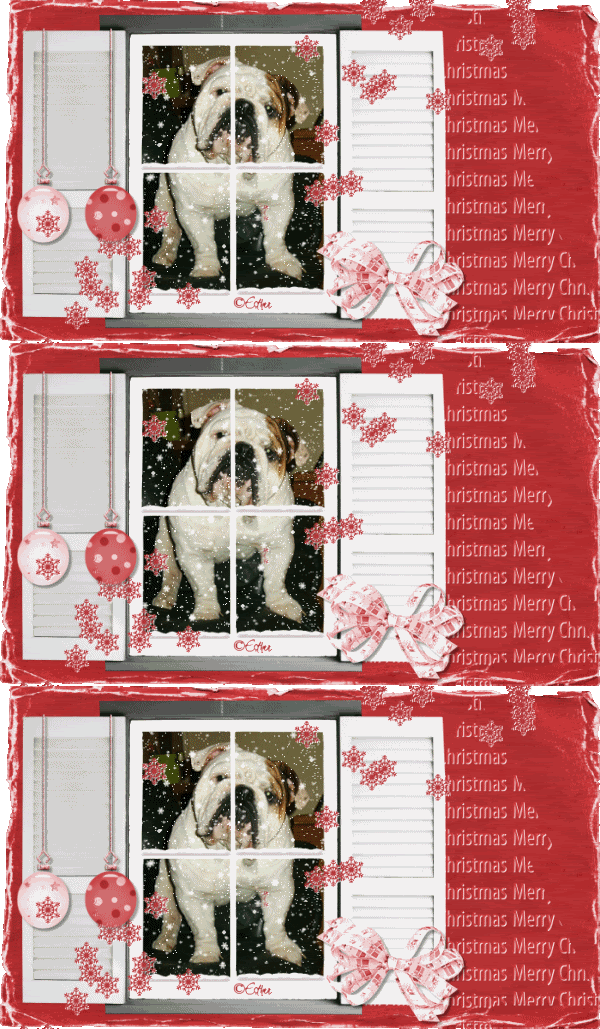
Click on the image for truth size.
Neede:
Photo (231x311 pixels)
Tubes:
Backgound Snowy Window (red or blue)
Christmas balls Snowy Window (red or blue)
Snow Snowy Window
Snowstars Sowy Window (red or blue)
Trap Snowy Window (red or blue)
Window Snowy Window
Word Art Snowy Window (red or blue)
Download materials
1. Open the photo and tubes in psp
2. Open a new image 700x400 pixels transparent
3. Selections – Select all
4. Go to your Backgound Snowy Window
Edit - copy
5. Return to the image
Edit - paste - paste into selection
6. Selections – select none
7. Go now to your window snowy window tube
Edit - copy
8. Return to your image
Edit - paste - paste as a new layer
9. Activate move tool and drawer the window to the left
(see example)
10. Actibvate selection tool – rectangle
Feather 0 and mark anti alias
11. Pull a rectangle over the window
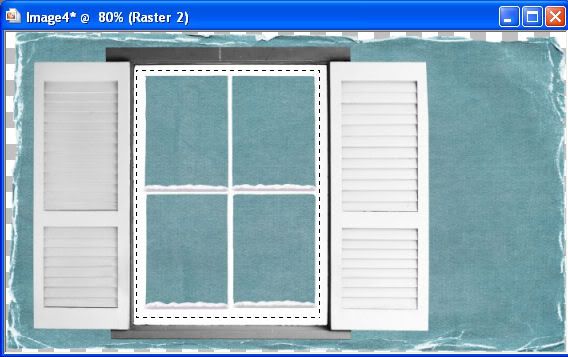
12. Layers - new raster layer
13. Go to your photo
Edit - copy
14. Return to the image
Edit - paste - paste into selection
15. Selections - select none
16. Layers - arrange - move down
17. Go to the layer palette and make raster 2 active
18. Go now to Word Art snowy window
Edit - copy
19. Return to your image
Edit - paste - paste as a new layer
20. Activate move tool and move the Word Art to right
(see example)
21. Layers - arrange - move down
23. Effects – 3d effects – dropshadow
Horizontal and vertical 1 – opacity 100 – blur 0 – color white
24. Go to the layer palette and make raster 2 active
25. Go to the Christmas balls tube
Edit - copy
26. Return to your image
Edit - paste - paste as a new layer
27. Activate move tool and move the tube on the left shutter
(see example)
28. Effects – 3d effects – dropshadow
Horizontal and vertical 3 – opacity 40 – blur 0 – color black
29. Go now to the snowstars tube
Edit - copy
30. Return to your image
Edit - paste - paste as a new layer
31. Activate move tool and move the tube to left
(see example)
32. Effects – 3d effects – dropshadow
Horizontal en vertical 1 – opacity 100 – blur 0 – color white
33. Activate Eraser tool and erase the stars on the middele of the window
size 70 en hardnes 100
34. Go now to your trap snowy window tube
Edit - copy
35. Return to your image
Edit - paste - paste as a new layer
36. Activate move tool and move the tube to the lower part of your right shutter (see example)
37. Effects – 3d effects – dropshadow
Horizontal and vertical 3 – opacity 40 – blur 4 – color black
38. Layers - new raster layer, place on this your water mark
39. Image – resize – 600 pixels width
mark resize all layer
40. Go to the layer palette and make raster 3 (photo layer) active
41. Adjust - sharpness - sharpen
42. Go to the snow snowy window tube
Edit - copy
43. Return to your image
Edit - paste - paste as a new layer
44. Activate move tool and move the tube over the photo
45. Layers - duplicate
46. Image - flip
47. Layers - duplicate
48. Layers – flip
49. Go to the layer palette and close copy of raster 9 and copy (2) of raster 9 (by click on the eye)
50. Edit – copy merge
51. Open animation shop
52. Edit - paste - as new animation
53. Return to psp
Go to the layer palette and close raster 9 and open copy of raster 9 (by click on the eye)
54. Edit – copy merge
55. Return to animation shop
Edit - paste – after current frame
56. Return to psp
Go to the layer palette and close copy of raster 9 and open copy (2) of raster 9 (by click on the eye)
57. Edit – copy merge
58. Return to animation shop
Edit - paste – after current frame
59. Edit – Select all
60. Animation – frame properties – display time 30
Save and ready is Snowy Window
We are very curious to your development of this tutorial.
This lesson cannot without authorisation of EM design on another
forum or website' s be placed. This lesson has been made on
14 december 2008 A type equal lesson relies purely on contingency





Geen opmerkingen:
Een reactie posten