
Click on the image for truth size.
Needed:
Tubes
Nomad Tube
Nomad veren tube
Nomad kruissteken
Mask:
Nomad masker
Font:
CircleD
Plugins:
Unlimited 2.0
Alien Skin Eye Candy 5
Download material
1. Open the Nomad tubes and Nomad Masker
2. Take two colors with you piped from your tubes, light foreground color and a dark backgound color
3. Open a new image 500 X 500 pixels transparent.
4. Activate flood fill tool and fill the image with foreground color
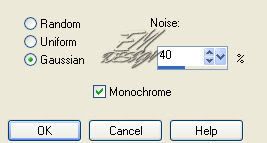
5. Adjust - add/remove noise - add noise
6. Effects - plugins - Filter Unlimited II - edges squares - square edge 4.
Minimise this image, we need these later.
7. Open a new afbeelding 500 X 500 tranparent.
8. Activate flood fill tool and fill the image with foreground color
9. Layers - new rasterlayer
10. Fill the image with background color
11. Layers - new mask layer - from image - Nomad masker
Mark source luminace and unmark invert mark data
12. Layers - delete
13. Layers - merge - merge group
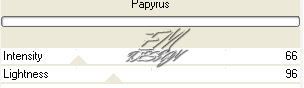
14. Effects - plugins - Filters Unlimited 2.0 - Paper textures - Papyrus
15. Go to kruisteekjes tube
16. Go to the layer palette and set blend mode on luminance (legacy)
Edit - copy
17. Return to your image
Edit - paste - paste as a new layer
18. Activate move tool and move the tube on the upper linker horizontal edge

19. Activate eraser tool and erase the cross sign which puts outside the edge.


20. Layer - duplicate
21. Activate move tool and move the copy on the edge below
22. Layers - duplicate
23. Move this copy on the right horizontal edge
24. Activate eraser tool and erase the cross sign which puts outside the edge.

25. Lagen - duplicate
26. Image - rotate - free rotate - left 90
27. Activate move tool and move this copy on the first vertical edge left
28. Layer - duplicate
29. Move the copy on the edge on the second vertical seam
30. Go to the layer palette and close all layer except kruissteekjes layers
(click on the eye to close)
31. Layers - merge - merge visible
32. Go to the layer palette and open all closed layers
33. Layers - new rasterlayer
34. Activate selection tool and pull a square in the bottom area


35. Go to the nomad tube,
Edit - copy
36. Return to your image.
Edit - paste - paste into selection
37. Go to the layer palette and set blend mode on luminance (legacy)
38. Selections - select none
39. Layers - duplicate
40. Image - mirror
41. Activate move tool and move this copy in the area above the original tube
42. Layers - new rasterlayer
43. Activate selection tool and pull a rectangle in the area at the right-hand side
44. Edit - paste - paste into selection
45. Go to the layer palette and set blend mode on luminance (legacy)
46. Selection - Select none
47. Go to the layer palette and close all layer except the picture layer
(upper 3)
48. Layers - merge - merge visible
49. Go to the layer palette and open all layer
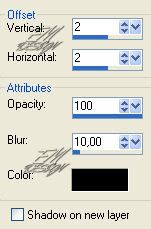
50. Effects - 3D effects - dropshadow
51. Layers - new rasterlayer
52. Activate selection tool and pull a square in the bottom area
(same settings)

53. Edit - paste - paste into selection
54. Selections - select none
55. Go to the veer tube (feather tube)
Edit - copy
56. Return to your image
Edit - paste - paste as a new layer
57. Activate move tool and move the feather in the hair
58. Layers - merge - merge all flatten
59. Image - add borders - 2 pixels background color
60. Image - add borders - 25 pixels foreground color
61. Activate magic wand, toleracne and feather 0,
select the 25 pixel border
62. Effects - plugins - Alien Skin Eye Candy 5 Textures - Weave.
settins: Horizontal ribbon is forground color
Vertical ribbon is background color

63. Selection - select none
64. Image - resize - 450 X 450 pixels
65. Edit - copy
66. Go now to your first image,
Edit - paste - paste as a new layer
67. Activate text tool - font CircleD, create as vector,Size 100, stroke width 2
68. Type the text in the middle
69. Layers - convert to rasterlayer
70. Effects - 3D effects - dropshadow
same settings
71. Layers - new rasterlayer, place on this your water mark.
72. Layers - merge - merge visible
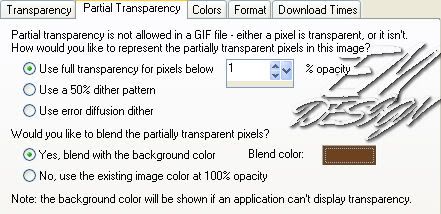
73. File - export - Gif optimizer.
Transparency:
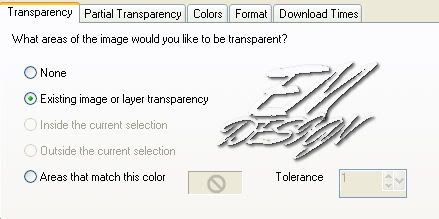
Partial transparency:
Color is foregroundcolor
save and ready is Nomad
We are very curious to your development of this tutorial.
This lesson cannot without authorisation of EM design on another
forum or website' s be placed. This lesson has been made on
29 october 2006 A type equal lesson relies purely on contingency


Geen opmerkingen:
Een reactie posten