
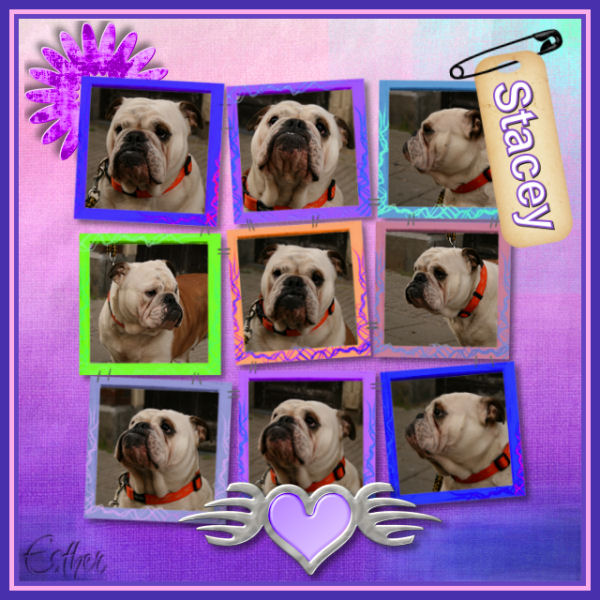
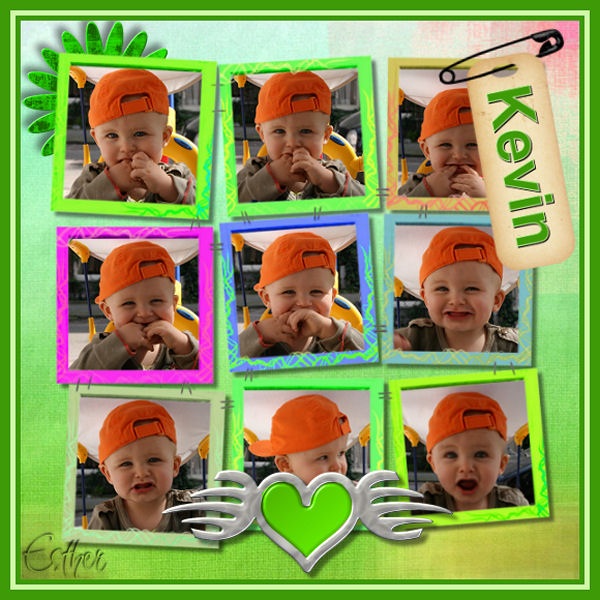
Click on the image for truth size.
Needed:
9 Photos
Tube’s:
Colorful tag bloem
Colorful tag achtergrond
Colorful tag frame
Colorful tag label
Colorful tag hart
Download material
1. Open the photos and material in psp ( choose from each tube the color which you want use)
2. Take two colors with you piped from one of your tubes, dark forefront color and a light backgound color.
3. Open a new image 600 x 600 pixels transparent
4. Go to the Colorful tag achtergrond
Edit - copy
5. Go to your new image,
Edit – paste – paste as a new layer
6. Go to the Colorful tag frame,
Edit - copy
7. Return to your image,
Edit – paste – paste as a new layer
8. Activate magic wand, mode: replace and tolerance and feather 0
9. Select the inside of the first frame
10. Selections - modify - expand – 4 pixels
11. Go to your first photo,
Edit - copy
12. Return to your image,
Edit – paste – paste as a new layer
13. Activate move tool and move the photo in the selection
14. Selections - invert
Press now on delete on your keyboard
15. Selections - select none
16. layers - arrange - move down
(if it is necessary, adjust-sharpness-sharpen)
17. Go to your layer palette, make upper layer (raster 2) active.
18. Repeat points 8 till 17 to place the remaining 8 photos
17. Go to your layer palette, make raster 3 active and close raster 2
(click on the eye for closing the layer)
18. Layers - merge - merge visible
19. Effects – 3d effects – dropshadow
horizontal and vertical 5, opacity 50, blur 5, color black
20. Image – resize – 90 precent
unmark resize all layer
21. Go to the layer palette and open raster 2
(click on the eye)
22. Go to the Colorful tag hart,
Edit - copy
23. Return to your image,
Edit – paste – paste as a new layer
24. Activate move tool and move your heart on the correct spot
(see example)
25. Effects – 3d effects – dropshadow
horizontal and vertical 5, opacity 50, blur 5, color black
26. Go to the Colorful tag bloem
Edit - copy
27. Return to your image,
Edit – paste – paste as a new layer
28. Activate move tool and move your Colorful tag bloem
on the correct spot (see example)
29. Effecten – 3d effecten – slagschaduw
horizontal and vertical -5, opacity 50, blur 10, color black
30. Layers - arrange - move down
31. Layers - arrange - move down
32. Go to your layer palette, make the upper layer (raster 3) active.
31. Go to the Colorful tag label
Edit - copy
32. Return to your image,
Edit – paste – paste as a new layer
33. Image - rotate - free rotate
left 10 precent
33. Activate move tool and move your label to on the top left-end corner
(see example)
34. Activate text tool, pick a nice font ( i got Arial)
35. Type your text and rotates the text till it beautiful in your label fit.
36. Layers - convert to rasterlayer
37. Effects – 3d effects – drop shadow
horizontal and vertical 1, opacity 100, blur 0, color black
38. Layers - merge - merge all flatten
38. Image – add borders – 5 pixels forefront color
39. Image – add borders – 5 pixels background color
40. Image – add borders – 10 pixels forefront color
41. Layers - new rasterlayer, place on this your water mark
42. Image - resize - 600 pixels
mark resize all layers
Save as .jpg and ready is Colorful Tag.
We are very curious to your development of this tutorial.
This lesson cannot without authorisation of EM design on another
forum or website' s be placed. This lesson has been made on
26 march 2008 A type equal lesson relies purely on contingency


Geen opmerkingen:
Een reactie posten